XmlTrek User Manual
2012-5-2
IntroductionXmlTrek is a marriage of the original mTrek/jTrek telnet server engine, with some modifications, with a Java client. The XmlTrek Java client extends the scope of the game from just the space environment to the actual planets and starbases found in the game quadrants. This is done by allowing the XmlTrek player to enter into side or mini games when orbiting a planet or docked at a starbase. These games are written as dynamically loadable Java classes, sorry for the tech speak here, and can be written by players but are vetted an served from our own servers. Currently these are very simple in nature just to test the process. The XmlTrek Universe is divided into Quadrants. Each Quadrant is populated by robot ships, starbases, stars, planets, nebulae and other stellar stuff. The Quadrant you will be started in will be the Alpha Quadrant. This Quadrant is not as hard a place to learn to play the game as the other Quadrants. Once you gain experience in the Alpha Quadrant you will then be ready to face the challenges of the other Quadrants. The XmlTrek GUI interface can be downloaded from www.xmltrek.com or www.xmltrek.ca. Return ... Getting StartedTo start the XmlTrek GUI download and unzip the XmlTrek zip file in its own directory. Then from this directory execute the command: java -cp ./xmltrekClient.jar ca.xmltrek.client.XmlTrek or using the file manager select this directory and double click on the file xmltrek.bat Note: To be actually sure of this step please see the read me file that comes with the XmlTrek zip file. Now the XmlTrek GUI is running it will ask you which game server you wish to connect to. 
once you have done this you will see a nice Message of the Day day screen with a little ad from one of our sponsors. 
Next you will be prompted to enter the name you want for your ship. 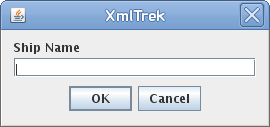
You'll be prompted to create a ship name(16 character max), a player name, and to choose/confirm a password. You're allowed to have as many or as few ships in your fleet as you like. Your player name and password however, will always remain the same. Once you've created a player account, and you're ready to add some more ships to your fleet (or replace the ones that have died horrible deaths), you'll log in much the same way as described above. The only real difference being that you won't have to come up with a player name or password since you already have those. If you've created a ship, managed to save it, and are returning to resume play in the same ship, The login process will be even simpler; no need for a player name, as the game remembers who each ship belongs to- Just the ship name and your password. Ship names are not currently owned by any one user. However, so long as you ship is alive it will be the only one with that name. Even if your ship is killed you still retain the rights to that name for a certain period of time so you can play your entire gaming session with the same name. Now, if you are creating a ship with a new name you will be asked to input your user name. 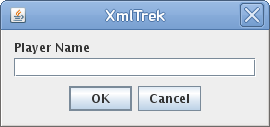
If you are a returning player it is a good idea to use the same user name so that all your ships can be grouped in the same fleet. If the name of your ship already exists you will skip this step and go straight to the password entry screen. As usual when entering a password try not to make it too simple. After all you don't want someone else driving your ships. 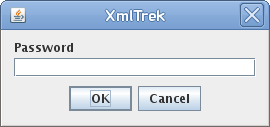
Following this, if you are a new user just joining XmlTrek, you will be asked to verify your chosen password. 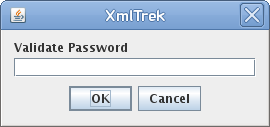
Then once the account creation and player verification phase is complete you will be presented with a list of ship types that you choose to fly. As with all things some are easier to operate than others. For a description of these various ships and how the function see the accompanying guide. 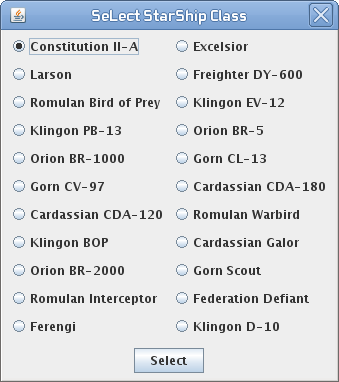
is complete you will be presented with the main gaming console. Note: If you want to use the legacy telnet interface you will need to start a console window on you host system and enter the command:
You will then be taken through a similar set of steps. Both GUI and telnet players reside in the same game. Return ... Game ScreenAfter you've created a ship, the main gaming console will appear. It is divided into several sections with each one performing or displaying one type of data. 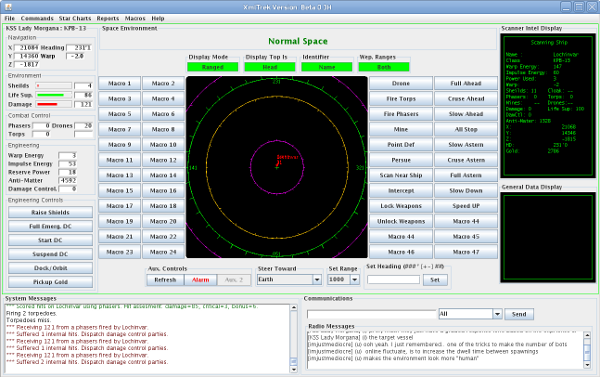
Return ... EngineeringThis section displays vital information about your ship. Available power, how your power is being allocated, speed, direction of travel, fuel remaining, how much damage and life support you have, and your exact location(X Y and Z)In addition is also has a set of six predefined engineering client side macro buttons. These buttons are totally user configurable as described in the section on Client Side Keyboard Macros.Anti-MatterAnti-matter is what fuels your ship. As you use energy in moving about or combat it will get used up. You can replace your anti-matter at your ships home planet. CrystalsDilithium crystals are used to boost power output. They can be purchased at any planet with a 'C' resupply code. They do not get used up in the general sense however, they are very brittle and should you start to take internal damage they will quickly degrade. Over warping will also degrade your ship's crystals. Return ... System MessagesThis is the area where all messages the interface receives that are not from other players are displayed. There are three main types of messages:
Return ... CommunicationsThis area is used to send messages to other players in the game and where messages are displayed. It works across all quadrants in a game but not between separate games on the same server. Messages can either be sent to everyone or restricted to ships of you 'race', the ship nearest you or a specific ship as identified by its scan code. Return ... Intel Scan DisplayWhen every you scan and object or a ship a certain amount of intelligence is gathered about it. This data is displayed in this area. The data in this area is updated in real time.Return ... General Data DisplayThis is the area that will display data that is not related to the other areas of the display.Return ... Space EnvironmentSome areas of space have particular characteristics that will effect how you fly and fight your ship. This condition of space surrounding your vessel will be display here.Return ... The Main Scanner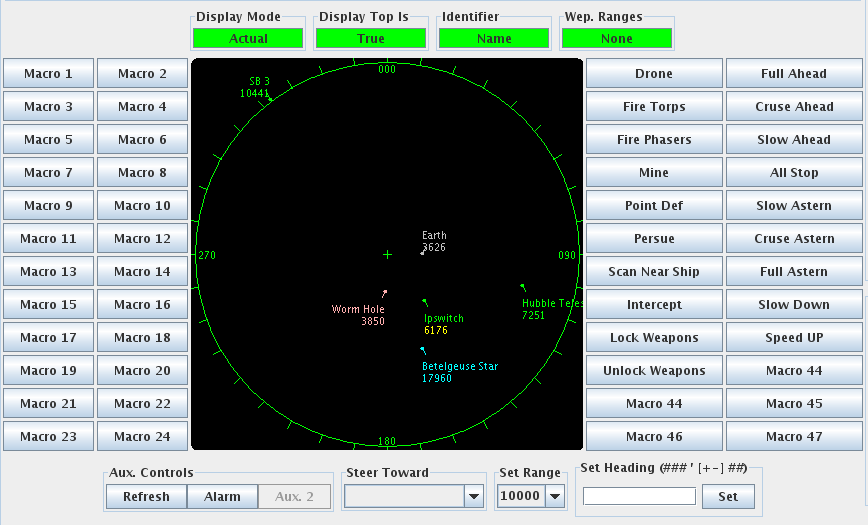
The central scanner displays the position of all visible targets using the following colours:
Although basically green target designators have their colours varied depending on their threat level. The top line of each target designator identifies the target. The second line is the range to the target. If the range is yellow then the target ship has you in its scan range. If the range is red then the target has you in weapons range. I the entire target designator is yellow then they are scanning you if it is red then they have a weapons lock on you. When you are scanning an object there will be a yellow line drawn from the center of the scanner to the object being scanned. When you have a weapons lock on an object the line is red. Along the top of the scanner is a set of four green buttons. This controls the manner in which the data is in the scanner is displayed.
On either side of the scanner are two rows of programmable macro buttons. These can be programmed by the player to perform any function that the keyboard can. For information of how to program these see the section on Client Side Keyboard Macros. Below the display there are a set of non configurable controls.
Note: There is a green outline that surrounds the non messaging portion of the game screen. This shows that the keyboard has focus and anything type on it will be sent to the server for processing. When this band is red it means that another part of the display has focus and that any key pressed will not be sent to the server. Return ... Using the MouseThe mouse has the following pre-programmed functions.
The remainder of the mouse buttons and modifier combinations can be assigned client side macros using the Macros-> Mouse menu item. For addition information see the section on Client Side Keyboard Macros. The scroll button on the mouse will increase and decrease the scanner display range. IF the shift button is pressed then it wili increase and decrease your speed. Return ... Pre Programmed Keyboard FunctionsThe Key Pad keys have been pre programmed with combat functions. For them to work the Num Lock must be on. The XmlTrek GUI will attempt to do this on start up. These are the currently defined keys.
If the Num Lock is not set you can use the keypad as you would any other set of key and assign your own Server Side Macros to them. Directional key are programmed to steer your ship:
Return ... Movement And NavigationBefore you start blasting through space at maximum speed, looking for enemies to blow up, You need to be familiar with how to steer your ship. Nearly all navigation can be accomplished by setting intercept courses with other ships and objects. For a complete list of planets and starbases you can visit, click here. Steering towards a ship is accomplished in much the same manner. Lowercase o for scan ship, the letter g for the ship named Danger, and then toggle intercept mode by typing i Heading can be manually changed by turning off intercept mode and using one of these commands:
Your ship is capable of determining from which direction a message is sent. To put your ship on an intercept course with the last message received, use the ESC Ctrl-Mcommand. Return ... Setting Warp SpeedThe maximum cruise speed your ship can be from Warp 10 to 16, depending on ship class. Negative warp values indicate that your ship is moving in reverse. Use these commands to affect your speed:
It is important to know your ship class's Maximum Turning Warp and Maximum Cruising Warp values. If you attempt to turn your ship when traveling faster than your Turning Warp, your ship will incur damage. Going faster than your Maximum Cruising Warp will also give your ship damage. Return ... Transwarp DriveThe Excelsior and DY-600 class ships are transwarp capable. Transwarp lasts for about 10 seconds, and during this time your ship will have an effective speed from around Warp 20 to Warp 30. Transwarp drive can be engaged only when the ship is already traveling at Warp 3 or better. A high warp speed when entering transwarp, however, insures a faster transwarp speed and a correspondingly greater distance traveled during the 10 or so seconds of transwarp. Structural damage occurs when transwarp is engaged at less than Warp 4. Transwarp costs a substantial amount of Warp Energy. Return ... Tracking in TranswarpThe Excelsior is equipped with "tracking transwarp", and transwarping is engaged while something is being intercepted, transwarp will disengage at the exact moment needed to place you as close as possible to what was intercepted. Transwarping without tracking is a blind blast through space and often places your ship far away... from everything. The Excelsior class star ship does not start out with transwarp capability; a visit to Earth is necessary to get this. Return ... NavigationNearly all navigation can be done by setting intercept courses with other ships and objects. Use the i command to set an intercept course with what is currently being scanned. A second i command toggles intercept mode off. Be careful to not use this command when exceeding your Maximum Turn Warp. The command ctrl-I ship letter can be used to intercept a nearby ship which isn't being scanned. Specific coordinates can be intercepted with the I command. Heading can be manually changed by turning off intercept mode and using one of these commands:
Your ship is capable of determining from which direction a message is sent. To put your ship on an intercept course with the last message received, use the ESC Ctrl-M command. Return ... Orbiting and DockingAt several times during the game you will need to dock at a starbase or orbit a planet in order to resupply you star ship. Each planet or starbase has available different things. These are show in the Scanner Intel Display when they are scanned. To dock or go into orbit you must be within 1 unit of the base or planet. To get there a procedure such as this usually works. Slow down to Warp 3 when within 50 units of your intercepted destination. Stop your ship with Ctrl-W when a distance of 0 or 1 is displayed. You can now orbit or dock by using the "." command. It takes a few seconds before you start receiving things onto your ship. The Scanner portion of the System Message field is used to display information about another player's ship or information about one of the other "objects" in the game. When you are using the XmlTrek GUI and you are either docked at a starbase or in orbit about a planet you have the option of entering the starbase or landing on the planet. 
Both actions will take you into a mini game that is attached to each of these. Currently most of these locations have place holder games. In order to protect you ship while you are in a game mini game your ship is saved and then restarted once you leave the mini game. 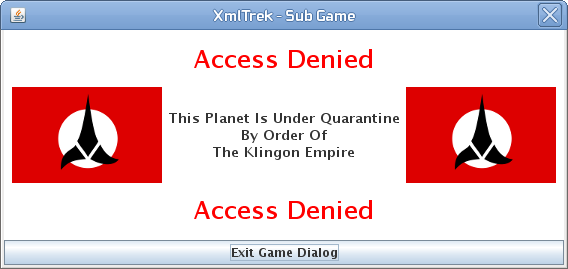
Any users who would like to write a mini game please contact us. Return ... Ship PowerThe total amount of power a ship can use is the sum of Warp Energy and Impulse Energy. You can allocate this to one or more functions of the ship: Warp Drive, Shields, Load Phaser, Load Torpedo, Damage Control and Cloak. Both Warp Energy and Impulse Energy output can be damaged when under attack. Warp Energy output is also damaged by traveling faster than your ship's Max Cruising Warp speed. Warp Energy and Impulse Energy are restored to normal with Damage Control. Extra Warp Energy above a normal level can be obtained by visiting a dilithium crystal planet such as Rigel XII. The Freighter DY-600 can repair its Warp Energy to its maximum value, so it doesn't ever have to go to a crystal planet. Return ... AntimatterThis can be viewed as your ship's fuel. Maximum Antimatter on board a ship is 5000. Antimatter is used up at a rate based solely on the amount of Warp Energy your ship is using. All Impulse Energy is used before any Warp Energy is; so Warp Energy used is the amount of power allocated to ship functions minus the amount of Impulse Energy available. Additional Antimatter is picked up from your ship's home planet or from A-Class planets which don't have ship-types based there. Return ... ShieldsShields absorb the energy of incoming attacks, except for ramming. Each time shields absorb an attack, they are lowered by an amount proportional to the energy of the attack. Once shields have dropped all the way down, further attack energy causes damage to Warp Energy, Impulse Energy, and Damage. The Damage field refers to the structural damage of your ship. A Damage amount greater than 100 causes Life Support to drop by about 1% per second. Damage greater than 200 results in immediate explosion of the ship. Shields are ineffective inside a Nebula. Commands for Shields:
Return ... Damage ControlPower allocated to Damage Control repairs damaged parts of the ship. The more power allocated, the faster repairs happen. Given enough time, Damage Control will fully restore Warp Energy and Impulse Energy to normal levels, and completely repair any Damage. Commands for Damage Control:
Return ... Tractor BeamYour ship's tractor beam is used to pull one of the Observer Devices or a Lithium Mine around with your ship. Use the % command when weapons are locked to toggle on/off the tractor beam. Return ... Transporter
Return ... CloakingSome ships can engage a cloaking device which makes them invisible to all other ships. Ships can cloak only for a limited time; the time remaining is shown in the Cloak field. When time runs out, the cloaking device has burned out. Upon disengaging, the cloaking device immediately regenerates available cloak time. To repair a burned out cloaking device, or for the II-A to obtain a cloaking device to begin with, you must visit Romulus. The "z" and "Z" commands turn on and off the cloaking device. The BOP's cloaking device uses 80 power units. A cloaked ship can lock weapons on nearby ships, but it cannot fire phasers or torpedoes. Mines, buoys and drones can be launched while cloaked, however. Return ... Sending MessagesYour ship allows you to send messages to another player, to all players, or to a select list of players. Sending too many messages during a short time causes your transmitter to burn out; and you must travel to a FR (Fix Radio Transmitter) planet to get it fixed. Stars, comets, nebulae, quasars and pulsars cause radio transmission and reception interference. The 3 ways to send messages to other players:
Return ... CombatTo lock weapons on a ship or object, it must be within the maximum torpedo range of the ship you are piloting. First scan it, then use the Ctrl-L command. To lock on a ship not being scanned, but within scanning distance, use the ESC Ctrl-L ship letter command. Most phaser and torpedo weapons require that weapons be locked to have maximum effect. Return ... PhasersPhaser range is typically from 0 to about 500 units depending on ship class. Damage done by phasers is maximum at point-blank and minimal at maximum range. Phasers are loaded in increments of 5 power units. The waiting period after firing phasers before they can be loaded again is based on the firing strength. Firing phasers without weapons being locked causes them to be fired wide. This gives half the normal damage, but to everyone within phaser range; including ships which are cloaked. Commands for Phasers:
Return ... Expanding Sphere Inducer Phaser - Cardassian and FerengiWhen fired, the ES Inducer gives damage to everything in phaser range, cloaked or not. The amount of damage depends on how close the enemy ships are to you, and how many of them are in range. Locking weapons does not affect the ES Inducer in any way. The closer the enemy ship is to you, the higher the damage; but a ship at the same coordinates is not hit. Damage given to individual ships is drastically reduced with more ships in phaser range. ESI does not hit anything at 0 distance. Be careful near planets and starbases because if you accidentally shoot one, it will shoot back and continue to do so until you dock or orbit. At that point, it will take up to 1000 gold from your ship before giving you peace. Return ... Teleporter Phaser - Freighter DY-600This is one of 2 phaser weapons on the Freighter. Instead of causing any damage, it teleports the enemy away. The higher the phaser strength, the farther the distance of the teleport. This is used on ships in Phaser range, with weapons locked. Switching between phaser types is done with the ESC Ctrl-P command. Return ... Agonizer Phaser - WarbirdThis is used like other phaser weapons, but it uses a single 40-energy charge, and uses up one plasma torpedo. It gives the same damage to all ships in phaser range, whether the other ships are cloaked or not. The damage is not divided among several ships if more than one is hit. It gives constant damage at all distances within phaser range. Return ... Disruptor Phaser - Klingon D-10This weapon is used just like regular phasers, except that it deals the same amount of damage at all distances within phaser range. Return ... TorpedoesCommands for Torpedoes:
Return ... Photon TorpedoThis weapon has a range which is from about 500 units to about 2200 units, depending on ship type. A ship can load only as many as it has torpedo tubes. Unlike phasers, torpedo's give maximum damage at maximum range, and minimum damage at minimum range. Return ... Torpedo - Freighter DY-600The Freighter DY-600 is equipped with a conventional torpedo weapon; which gives 100 damage. These can hit from 0 to 1000 range. Return ... Obliterator Torpedo - Klingon EV-12 & PB-13Several obliterator torpedoes can be loaded and fired at the same time, with each one drawing 10 power units. Unlike photon torpedoes, these give the same damage throughout their entire range. The Klingon ships replenish obliterator torpedoes automatically without requiring a trip to a starbase. Return ... Plasma Torpedo - RBOP & CV-97Some ships use plasma torpedoes instead of photon torpedoes. There is 1 torpedo tube in plasma equipped ships. Loading a plasma torpedo uses 85 energy units. The energy used to load a plasma torpedo is immediately available on firing or unloading. If weapons are locked, this is fired in the direction of what is locked on to. If weapons are not locked, this is fired straight ahead. Unlike the other phaser and torpedo weapons, this does not hit instantly. The plasma torpedo is a device which travels from warp 9 to warp 10; and shows up in the tactical display. It gives massive damage if it hits the target, but it is possible to avoid. This is loaded, unloaded, and fired with 'T', '^t', and 't' respectively. The plasma torpedo lasts 20 seconds, and each of its last 5 seconds, it loses 10% of its strength. Plasma will give 1500 damage units at full strength. This will hit any other ship which comes within 200 units of it; friendly or not. Return ... Variable Speed Plasma Torpedo - WARBIRDThis type of plasma torpedo can be set to travel at speeds from Warp 5 to Warp 10. Set a specific speed with the the "ESC T speed" command. Use "ESC T a" to have the plasma speed automatically be set to the speed of your ship. The faster the plasma torpedo speed, the more damage it gives (eg., a Warp 10 torpedo gives a maximum of 1200 damage units). Return ... Plasma Bolt Torpedo - Gorn CV-97Only one plasma bolt torpedo can be loaded at a time, and one of these requires 85 power units to load. These only hit a target when weapons are locked on a ship within torpedo range. 750 damage units are given to a ship when hit with this weapon. The Gorn CV-97 can fire both plasma torpedoes and plasma bolt torpedoes. Use the "ESC ctrl-T" command to switch between them. Return ... MineIt takes no power to lay a mine. You must wait at least 10 seconds after laying a mine before you can lay another. Mines are placed 150 units directly behind your ship, or 150 directly in front when you are traveling negative warp. Mines have an activation radius of 100 units. The M command is used to lay mines. The transporter can be used to pick up stray mines by using the $ command. Your ship must be within 110 units, but outside the 100 unit mine activation radius to transport mines aboard. Return ... DroneDrones, like mines, require no power to fire and have a 10 second waiting period. They behave like guided missiles and have about half the strength of a mine. Weapons must be locked on a ship or object when a drone is fired, or it won't hit anything. Drones have an activation radius of 100 units. Use the d command to launch drones. The Cardassian ships can use the Ctrl-D command to set drone speed. The faster the drone speed setting, the less damage the drone gives. Return ... RammingYou can ram your ship into another if distance is displayed as 0 units. The 'r' command is used to do this. Ramming gives 20 to 25 Damage to both ships. Shields are ineffective against ramming. Return ... Inventory objectsReturn ... BuoyA buoy is used to detect the presence of enemy ships, even if they are cloaked. Ships have an unlimited supply of buoys, require no power to launch, and have a ten minute waiting period before another can be launched. The lifetime of a buoy is a few minutes. When another, possibly cloaked, ship comes within 2000 units of your buoy, you are notified of the ship's exact location. Your ship's last-seen-at data is updated to reflect this, allowing you to set an intercept course to the enemy ship. The b command drops a buoy at your current location. Return ... Ship DeathReturn ... Self DestructShips are capable of self destruction. When your ship gets wounded beyond repair, engaging the auto-destruct mechanism may be the best action. The D command is used to do this. The auto-destruct sequence is aborted by using the D command again. The amount of damage an exploding ship gives to nearby ships is dependent on the amount of antimatter on board the exploding ship, and the distance to the other ships. Return ... Blow UpIf a ship receives more than 200 damage then it will blow up with a satisfying BOOM!!! This results in a debris field to show the Universe of your passing. Return ... SuffocateIf a ship runs out of life support then the crew all die. Nothing is left to show you were ever there and the Universe does not even notice your passing. Return ... Observer DevicesThere are several Observer Devices which can be used to scan ships from very far away. For example; Mars Observer, Hubble Telescope, Skylab, and Voyager 7. Every 5 minutes, these choose the nearest ship within 5000 units, if any, and continually broadcast the vital statistics of the ship. You can see this information by just scanning the Observer Device itself. These can even scan cloaked ships. Return ... ScoringThere are six components of a ship's score:
Gold-pressed latinum bars are used as the currency and score. Supplies normally cost some gold, but are free if you are broke; which you are when you start out. There are 3 ways to acquire gold bars: Dock at a starbase after giving damage to other ships. The starbase will award you gold equal to (DmgGiven+Bonus)/10. Destroy another ship with gold on board. When a ship explodes, loses life support, or just quits; all of its gold up to 1000 plus 10% thereafter is left behind for you to pick up. Also, ships with greater than 100 Damage accidentally drop chunks of gold bars you can pick up. When a ship is destroyed, its gold bars are left in the "ship debris". If you are the first one to the debris or gold, you can retrieve the gold by locking weapons on the "ship debris" and activating the transporter. When you exit the game a set of a high scores list are displayed. One for overall high scores, another for ship class high scores and one of you own ships. The previous tow lists will only show players who have played in the last 14 days. 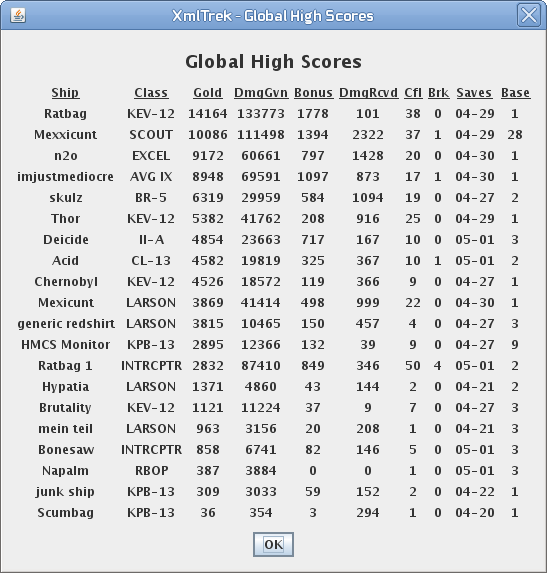
Return ... What is gold? How do you get it? What can you buy with it?Some people would like to think it gives an indication of how good a player they are, but the other fields in a ship's score are more revealing about that. Anything you get for your ship (crystals, torpedoes, drones, mines, antimatter) normally costs you some amount of gold, but if you have under 1000 gold, it is free. You can also lose gold by dropping it when you are losing life support, by paying to repair a cloak or transmitter, or by buying peace with a planet or starbase after shooting it. There are three normal ways to get gold:
Another way to get gold is to destroy a starbase. When a base reaches 200 damage it will detonate and send gold chunks flying. Additionally, ships which break save (connection closed without dying, quitting, or saving at a starbase) lose 1/3 of their gold, and 10% of their total gold (before the break penalty) remains behind to be picked up. To pick up gold, you scan and lock weapons on the ship debris or chunk of gold and them beam it aboard using the transporter. However, the transporter only works within 200 units. You can also pick up gold by running over it, but if you are going too fast, you might miss it. Return ... Keyboard MacrosYou can assign multiple key strokes to practically every button on the GUI and to almost every key on the keyboard. Depending on where the key strokes are stored they are refereed to as Server or Client side macros. The original mTrek/JTrek server side macros and XmlTrek client side ones. Server side macros are sent to the server and executed there where as client side ones are executed in the GUI and individual key strokes resulting are sent to the server. Server side macros are faster however client side ones do have added features. Return ... Server Side MacrosTo set up a keymap, type (, then the key you want to map. You then will be prompted to type in a line of what you want it mapped to. To unmap a previously mapped key, use ) followed by the key. Keymaps are preserved across saving and restoring ships. The text of mapped strings uses a format similar to that used by C Language strings. Use \r to indicate a return. Control chars are specified with their octal equivalent such as \033 for escape. It is inconvenient to manually set up favorite keymaps each time you start a ship. A way to deal with this is to yank keymap definitions out of one xterm window and paste them into the game xterm window. In the Windows world, that translates to using Notepad and creating a text file for your keymaps. Each time you start a new ship, open that document, and copy its contents into your telnet window. Octal equivalent of control chars:
Example If you like to have a keymap for each digit 1-3 to set warp to the corresponding value and to map '$' to send a true message to all players, you can use a file like this:
When you're creating your keymaps, keep in mind that you do so with the EXACT keystrokes that you would press normally (substituting \r for any carriage returns). For instance, loading and firing torpedoes: you load with shift-t and fire with t. To scan the nearest ship, you press o., to lock weapons you press ctrl-l. To combine that into a single action, you could map your 0 (zero) key to:
The '\014' is the octal equivalent of pressing ctrl-l (^L). So anytime, you need to shoot your torps, you press 1 key, instead of 8! And that's for a ship with only 4 torpedo tubes! You can increase the complexity as much as you like:
This will turn damage control off, scan nearest ship, lock weapons, load and fire torps, and IF your torps don't fire UNLOAD all torp tubes, bring up the status message showing how many torps you have left, fire a drone, and apply some free energy to damage control. Below, you'll find some generic keymaps that will work for any type of ship. These are very basic, so as you learn the game, you will want to expand upon them, tailor them to specific ship classes, and adjust them to accommodate your typing skill and style of play.
Return ... Client Side MacrosMost buttons and some mouse buttons support Client Side Macros. These are much the same as the Server side macros with a couple of minor changes. Which are described on the editors themselves. To edit a button macro select the button with a right mouse click. This will bring up the macro editor for that button. 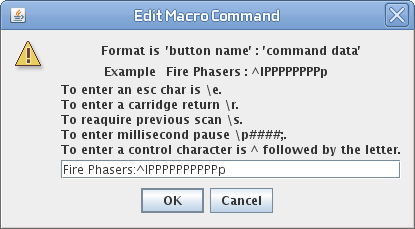
To edit Client Side Macros assigned to the mouse buttons use the Macro->Mouse menu selection to launch the Mouse Macro Editor. 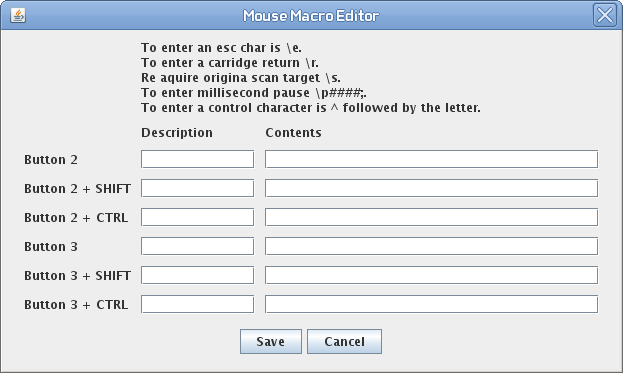
Return ... The XmlTrek UniverseXmlTre is a game of space exploration, wonder and of course mindless destruction and combat. The playing area is set in a quadrant. Each game server can maintain any number of quadrants and travel between quadrants is very simple. Return ... QuadrantsEach quadrant is an infinite three dimensional space with the majority of objects within close proximity of the 0,0,0 position. Various stellar and man (intelligent being) made objects populate each quadrant and each object has its own unique properties. Return ... StarsThis is an object that you cannot orbit. If you try to orbit the solar wind will throw you back out into space. PlanetsPlanets are places where you can resupply you space ship. Each planet will have a resupply code that describes what they have to offer. However, they are not free. You have to pay for them with gold. Unless you have no gold and they they are free. In addition some planets will sell you new equipment or even entire new star ships. Inhabited planets do not like space battles to happen in their immediate vicinity. I scares away legitimate customers.
StarbasesStarbases are places where you can resupply you space ship. Each starbase will have a resupply code that describes what they have to offer. However, they are not free. You have to pay for them with gold. Unless you have no gold and they they are free. starbases do not like space battles to happen in their immediate vicinity as it scares away legitimate customers. They especially do not like people taking pot shots at ships parked in their landing bays.
An important thing to remember about Planets & Starbases is that they are places of business and do not take lightly to combat happening in their immediate vicinity. However, they are not as touchy as Starbases. Return ... Asteroid FieldsThese contain asteroids. If you travel through an asteroid field too fast you ship will get damaged. Return ... NebulaMakes cloaking devices ineffective in a radius. Nebulas range in radius from 500 to 5000 units. This only makes the cloak ineffective, it does not turn it off. If you leave your cloaking device engaged while in the area of effect, you will still be using up your cloak time, and your cloak will still burn out if you fail to turn it off in time. Also, there is transmission interference as in the nebula. Nebula also reduce scanning. You can not only hide in a nebula but you can also hide behind it. Return ... QuasarsMakes cloaking devices ineffective in a radius. This only makes the cloak ineffective, it does not turn it off. If you leave your cloaking device engaged while in the area of effect, you will still be using up your cloak time, and your cloak will still burn out if you fail to turn it off in time. Also, there is transmission interference as in the nebula. Return ... PulsarsIn this game, a pulsar is a quasar which is inactive for a period, then active, then inactive again. Currently, there exist pulsars with radii of 1000 and 2000 units. The transmission interference exists here as well, and does not vary with time as the cloak-damping effect does. Return ... Black HolesIf you get within 10,000 units of one, it will begin altering your course in its direction. The closer you get, the stronger the pull, and the further you will be dragged each time tick. If you are drawn to within a radius of 500 from the black hole, you will be moved somewhere in a dramatic manner, either somewhere distant within the quadrant where you started, or even into another quadrant. The black holes are Emergency Escape Devices. Love them. Remember them when you are being pursued by superior forces, or when you are damaged and cannot stop to heal because someone is chasing you relentlessly. If your pursuers follow you in, they will be displaced just like you will, but it is unlikely that they will end up in the same place as you. Given that your location after such a trip is in such doubt, however, this course should not be decided upon lightly, as you could easily end up in the midst of an ongoing battle. Return ... Worm HolesThe wormhole pulses every 30 seconds. It will disappear and then reappear. If you are within 500 spatials when it reappears, it will send you to a different quadrant. If your warp factor is zero or positive, you will go to the next-higher quadrant (ie, from alpha to beta, or from beta to gamma, or from gamma to alpha) while if your warp factor is negative, you will go to the next- lower quadrant. Also, as it says in the docs, once you go through the wormhole, you cannot pass through again for 60 seconds. Return ... AppendicesAppendix I - Command Summary
Return ... Appendix II - Quadrant DataAlpha Quadrant
Return ... Beta Quadrant
Return ... Gamma Quadrant
Return ... Omega Quadrant
Return ... Appendix III - Ship DataGeneral Stats
Return ... Appendix III - Ship DataWeapons Systems
Return ... Appendix IV - The XmlTrek Strategy Guide version 1.0Who this is for: If you know how to play the game, but are not an expert, this strategy guide is for you. Before going into tactics, I will discuss two very important points. Aggressiveness vs. Foolishness: There is a difference between being aggressive and being foolish, and that difference is the risk/reward ratio. Figure out the potential reward of your actions and decide whether it justifies the risk. Waiting until 0 range to phaser/cloak at the risk of being hit is usually worth the risk. You are taking a small risk for the potential to do more damage. Overwarping in an RBOP on a fully powered II-A is not. You are taking a huge risk in a strategy that has little chance of succeeding. Aggressiveness will put you ahead in a fight, foolishness will simply get you damaged(and killed). The loser is the one who makes the last mistake: Mistakes are extremely common in XmlTrek. They are the reason you will win and the reason you will lose. A good strategy will make it more likely that your opponent makes mistakes, and make your opponent's mistakes deadlier. At the same time, it will prevent your mistakes from being fatal. Once you master tactics, the next step is mastering strategy. You MUST develop good strategic skills to enter the XmlTrek elite. Tip - Your strategies must be realistic, rather than idealistic. Now to the tacticsStaying in range: A very important strategy in XmlTrek is to stay at a specific range, say 400-700. If you are able to do this, you have the power to decide when to back up to fire torpedoes and when to run at your target and phaser. Now you have the ability to surprise your opponent. There are two main ways to do this. The first method is to stop at the ideal range and wait. You then either run at the ship or back off, whichever is necessary to keep the range. You can also decide to turn rather than stop. This makes it easier to defend against mines/plasma/etc. I prefer the latter method.
Photon/Obliterator TorpedoesDefense - When defending your ship, you have two choices. Run or fight. Often, running is impossible, and an attempt at it will get you killed. In this case, your only choice is to fight off your opponent. Remember, the best defense is often a good offense. The best way to defend against a torpedo attack is called the "surprise-attack". Run from your attacker, and just before he gets into range, intercept him and fire torpedoes. At this point you can either cloak or run at your attacker. Once cloaking, you can either turn and run away from your attacker, or you can decloak near your attacker. Example: if you're a KEV fighting a Larson, you might want to decloak at about 700 range. If possible, try counting the ticks(the game updates that occur every 1/4 of a second). If you run at your attacker just before the next tick starts, he will have no time to react. This takes a bit of practice. Another option is to be purely defensive. Take a photon torpedo hit to your shields(to waste their torpedoes), and cloak/turn/run(to regenerate your shields). Avoid hitting mines and phasers. Example: If you're fighting a Larson in a KEV, you will be able to eat its torpedoes and end up alive. Offense - When firing your torpedoes, you often have a choice of either trying to get them off quickly, or carefully making sure you do maximum damage. If you are too slow, the ship may repair as fast as you are doing damage, wasting your torpedoes. It depends on the situation, but when using photons, I usually have the most success when I am careful about when I fire. But if you are not yet unable to do this quickly, you may want to try a different strategy. You also must counter your opponent's defensive tactics. Basically, there are two main ways to defeat the surprise-attack. 1) the backup-intercept - Chase your target, and constantly run from him just before you get into his torpedo range. Then you can surprise him when you go in for the kill. 2) stop just outside of your opponent's torpedo range, giving you time to react to your opponent. Take advantage of your ship's torpedo range, while avoiding the torpedo range of your opponent. For example, if you are a KPB fighting an excel, you may want to overwarp past the Excel's torpedo range to a point where the excel can't hurt you. Tip - Put "\033t" after your torpedo macros. This will tell you how many torpedoes you have left.
PhasersDefense - Use the surprise-attack to defend against phasers. Unexpectedly run at your opponent in an attempt to hit at 0 range. If low on energy, you might want to limit yourself to using only half of your potential phaser power, or you could end up too low on energy to survive. Offense - Be unpredictable, and try to hit at 0 range. The reward of hitting at 0 is usually worth the risk of getting hit, though it depends on the ship class of you and your opponent, the skill of you and your opponent, and each ship's damage. It is important to note that it is sometimes worth forcing your opponent to fire their phasers. If they fire full phasers and are subsequently damaged, they may not even have enough power to even move. In my RBOP, I have gotten CL-13s to under -50 power available(that's right, minus 50). Tip - A 5 power wide phaser burst will tell you how close a cloaked ship is to you. The more damage the phaser does, the closer the ship is.
MinesMines are very easy to destroy, just use a "O.\014Pp" macro to phaser the nearest object. One important point about mines is that they don't fire until the start of the next tick, when your opponent may have already moved. If your opponent is not moving, the macro "@-.2\riiM" will hit anywhere between 50-250 range. But this is not the case if he is moving. If your opponent is running from you, you must mine at a closer range, or the ship will pass your mine before it's fired. If you are being chased, you must fire the mine at a longer range, or it will miss. For example, if a RBOP fires a mine at a pursuing br5 at around 500 range, the BR will have virtually no chance to react. But if the RBOP tries to fire at 150 range, the br5 will pass the mine before it hits. Tip - To avoid mines, try using the surprise-attack to pass your attacker's mine range. Then, if possible, cloak/turn/run. If you're the attacker, you might try to go in for the mine at an unexpected time. To do this, you can stop just outside mine range to buy time, fool your opponent with the backup/intercept, or use the turn/intercept. Or, of course, you can use a combination of the three. If you are the faster ship, It's possible to get to 0 range, phaser, and mine, while being too close for your opponent to mine you. Possible defenses against this include 1) overwarping to get into mine range, and 2) firing a mine and running towards it at warp 5-6, in an attempt to hit your attacker as he is intercepting you.
PlasmaThe Fundamental Rule Of Plasma - Keep your plasma unlocked. This way, you can control the direction of the plasma. Use a u instead of \014 in your torpedo macros (such as "uTt]\033t" or "uTt[\033t"). Dodging Plasma - There are basically three methods of avoiding plasma, all of which you should use. The first strategy is to simply turn your ship with a macro such as "}HHHHHHHHHHHHHHHHHHKKKKLL"(if you use only H's or J's, you could be caught with the 0'90 rule. The rule is this: if you're at 0'90, An attempt to turn sideways is ineffective). This strategy is particularly effective when chasing plasma ships. The second strategy is to dodge the plasma itself. I don't have a specific macro for this. Instead, I back up from the nearest object with a "{O.ii[" macro, and then turn my ship with the aforementioned turning macro. This is particularly useful when you are very close to plasma. The third strategy is only useful when a plasma has recently be fired. A plasma takes 4 seconds to initiate(i.e., it won't detonate before those 4 seconds). If a plasma is fired very close to you, you can run at and pass a plasma before it initiates. Hitting with plasma - People generally hit plasma by mistake. Your job as the plasma chucker is to make it easy for your opponent to accidentally hit plasma. You will want to try to fire plasma at the right range, try to surround your opponent with plasma, and if possible, try to distract your opponent from the plasma. When I am at 0 range from my opponent, one of the strategies I use is a macro to back up from my own plasma "{O.ii[" . This is an attempt to catch my opponent in a plasma net. Another strategy is to use "turned" plasma to catch your target when he dodges. You need to find your own strategies, but whatever you do, make sure you get your opponent close to initiated plasma. Note that you may have the chance to mine/phaser while your opponent is focused on avoiding your plasma. There are two plasma macros I have found quite useful, especially for the CV-97. The first is the plasma-group. Make the macro "@0\ruTt\0...@9.6\r". This macro will cause your ship to travel at the speed of your plasma, allowing you to build up a wall of plasma around your ship. The second is the reverse-plasma. Make the macro "}ii]@0\rHHHHHHHHHHHHHHHHHHHHHHHHHHHHHHHHHHHHuTti[\033t" This will fire a plasma running at about warp -10, and then cause you to run at maximum warp. When a ship is chasing you, the plasma is running from them, and thus it can hit at closer range(remember the 4 second initiation for plasma). Drones: Like mines, drones are easy to destroy. And like plasma, drones take several seconds to initiate. But if you run back into drones your battle has left behind, there is a good chance they will hit your attacker.
Tips for each ship class
Constitution II-AAvoid getting hit. If a ship gets too close, you may want to cloak, turn, decloak and run.Hitting with mines and phasers should be your first priority. If you don't, you'll have a hard time killing anything. If I get to 0 range, I often phaser/cloak first, and mine after. After firing your torpedoes, you may have trouble getting in mine/phaser range without getting hit by your opponent's torpedoes. So cloak just outside of their torpedo range. If your opponent stops to repair, you may be able to get close enough under cloak to mine/phaser.
ExcelThe Excel's power is limited, especially after it has transwarped. Be wary of firing full phasers when damaged.To transwarp into an opponent's ship - 1)Press the macro "@4\r\033l" 2)Wait until the moment the transwarp countdown hits 1, the second before transwarp is engaged 3)Type the letter designation of the ship you want to transwarp into
LarsonTorpedoes are very important. Make sure you only fire when you know you will hit, and only at maximum range. When there is a decent risk/reward ratio, use your overwarp abilities(i.e. go warp 17).You may want to make a torp/overwarp macro, such as "@0\r\014TTTTtii@17\r\033t" As with any ship without a cloaking device, an excel is always in weapons range.
DY-600This is not a difficult ship to fly. Since you are the only ship who can fire torpedoes at close range, a DY will beat anyone in a close-range battle. Be sure to use your teleporter phasers when necessary.It is possible to put the "brakes" on transwarp. In transwarp, if you press the [ key, you will slow down to about warp 19.
Romulan Bird of PreyThe RBOP is a very powerful ship. It's combination of mines and phasers make it a mean close-range fighter, while its plasma gives it the potential to do huge damage. Use the strategies outlined above for plasma and mining.
KEV-12"People attack me, I destroy them." - Jay Ashworth on KEVs. This basically sums up the KEV. Wait for others to attack you. Then use your impressive firepower to defend yourself.Unfortunately, you will sometimes have to use the purely defensive strategy I outlined in the photon/obliterator torpedo section. Example: If you are fighting a cloaked RBOP, use up their mines by allowing them to hit you, and immediately regenerate shields by cloaking/turning/running. Or if you are fighting an II-A, try to waste their torpedoes while avoiding mines at all costs. One strategy I use against RBOPs is to move in a square while dodging plasma. This creates a mass of drones that the RBOP may hit. Be warned that certain combinations of ships, such as an II-A/Larson team, can kill even the very best KEVs. You have to be very careful in this ship, don't stray too far from a starbase.
KPB-13A just for fun ship, a KPB won't survive long. Use your oblits to your advantage, that is, stay at a range your opponent can't hurt you. This takes a LOT of practice.
BR-5The most survivable ship in the game. Use your speed to surprise your opponents. Don't let them know what's coming. Be aggressive, but not foolish.
BR-1000This is a mean close range fighter, as long as you don't miss your mines. Due to your 2200 torpedo range, hitting at maximum range is less important. Be aware that you can't overwarp, unless you want to take damage.When fighting a br5, make sure you don't miss your mines. Destroy with torpedoes as he flees. One strategy to help you avoid a br5's torpedoes: chase at the br5. When he runs into his torpedo range, back off into your own torpedo range. Then when it runs at you, just as he starts hitting you with torps, intercept the him. He will have a harder time hitting you.
CL-13Not a difficult ship to fly. Phasers are your primary weapon, torpedoes are secondary. Avoid mines, they are a powerful defense against you.Be aware that just after you fire full phasers, you are only able to go warp 3 under cloak. And that is at full power.
CV-97Now THIS is a difficult ship to fly. Be sure to have a macro to switch to plasma-bolt "\033\024t1" and one to switch to plasma "\033\024t0". This ship takes a LOT of power to move. After firing full phasers, you won't have enough power to go maximum warp. Be careful with your phasers.You will sometimes need to use defensive strategies similar to those used by the KEV. But the CV is much more powerful than the KEV in these situations. For instance, it can fire a plasma at a cloaked II-A, and then plasma-bolt as the II-A is forced to decloak. Or it can fire a plasma-group to prevent a RBOP from getting too close.
CDA-120This ship isn't good for much at all. Just use it to vulture others. I don't fly it.
CDA-180This ship isn't good for much either. But it can defend itself pretty well against attacks. I don't fly this ship, either.
WarbirdYet another pathetic ship, an inferior version of the RBOP. Learn how to use your agonizers. I know it's sad, but the agonizer is a major part of the warbird's arsenal.Well there you have it. For obvious reasons, I left out some of my more advanced strategies. But I hope this guide was helpful. Return ...
| |||||||||||||||||||||||||||||||||||||||||||||||||||||||||||||||||||||||||||||||||||||||||||||||||||||||||||||||||||||||||||||||||||||||||||||||||||||||||||||||||||||||||||||||||||||||||||||||||||||||||||||||||||||||||||||||||||||||||||||||||||||||||||||||||||||||||||||||||||||||||||||||||||||||||||||||||||||||||||||||||||||||||||||||||||||||||||||||||||||||||||||||||||||||||||||||||||||||||||||||||||||||||||||||||||||||||||||||||||||||||||||||||||||||||||||||||||||||||||||||||||||||||||||||||||||||||||||||||||||||||||||||||||||||||||||||||||||||||||||||||||||||||||||||||||||||||||||||||||||||||||||||||||||||||||||||||||||||||||||||||||||||||||||||||||||||||||||||||||||||||||||||||||||||||||||||||||||||||||||||||||||||||||||||||||||||||||||||||||||||||||||||||||||||||||||||||||||||||||||||||||||||||||||||||||||||||||||||||||||||||||||||||||||||||||||||||||||||||||||||||||||||||||||||||||||||||||||||||||||||||||||||||||||||||||||||||||||||||||||||||||||||||||||||||||||||||||||||||||||||